Cryogenic Labels for Lab Samples: Pricing and Options
26th Oct 2026
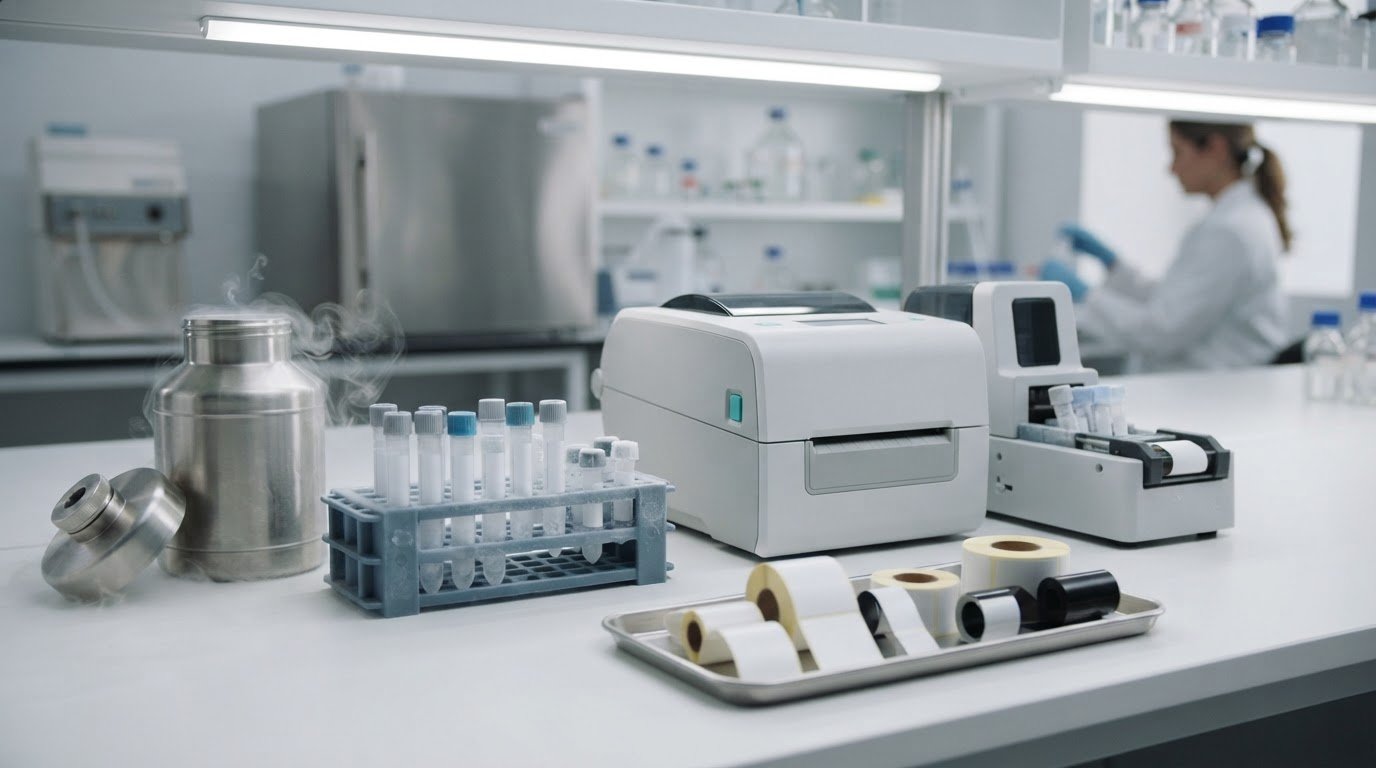
Automated application is possible, but compatibility depends on the label roll and applicator, not just the cryogenic rating. Cryogenic labels for lab samples need to match the applicator’s format and dimensions, while the label and adhesive must suit the sample’s storage conditions. A label designed for liquid-nitrogen storage may not suit every low-temperature application.
Labels should apply smoothly and stay legible through storage, without guesswork about format or ribbon. This guide explains how to assess applicator compatibility, compare label sizes and formats, and understand what affects pricing and quantity discounts. It also covers label resistance, kits, and ribbon selection, so you can narrow your options to suit your equipment and lab workflow.
Key Takeaways
- Match label dimensions and roll format to your applicator to assess whether automated application will work with your setup.
- Compare label sizes such as 0.5″ x 1″ and 1″ x 1″ against the space available on each sample container.
- Choose resistance requirements around the storage temperature and exposure conditions; some options are rated for -196 °C, while others are intended for -80 °C storage.
- Review how label format and order quantity affect pricing, and compare kits with separate labels and ribbons for your workflow.
- Consider the sample type, printer, and ribbon together when narrowing down options for tubes, vials, boxes, plates, racks, or straws.
Product pricing and quantity discounts
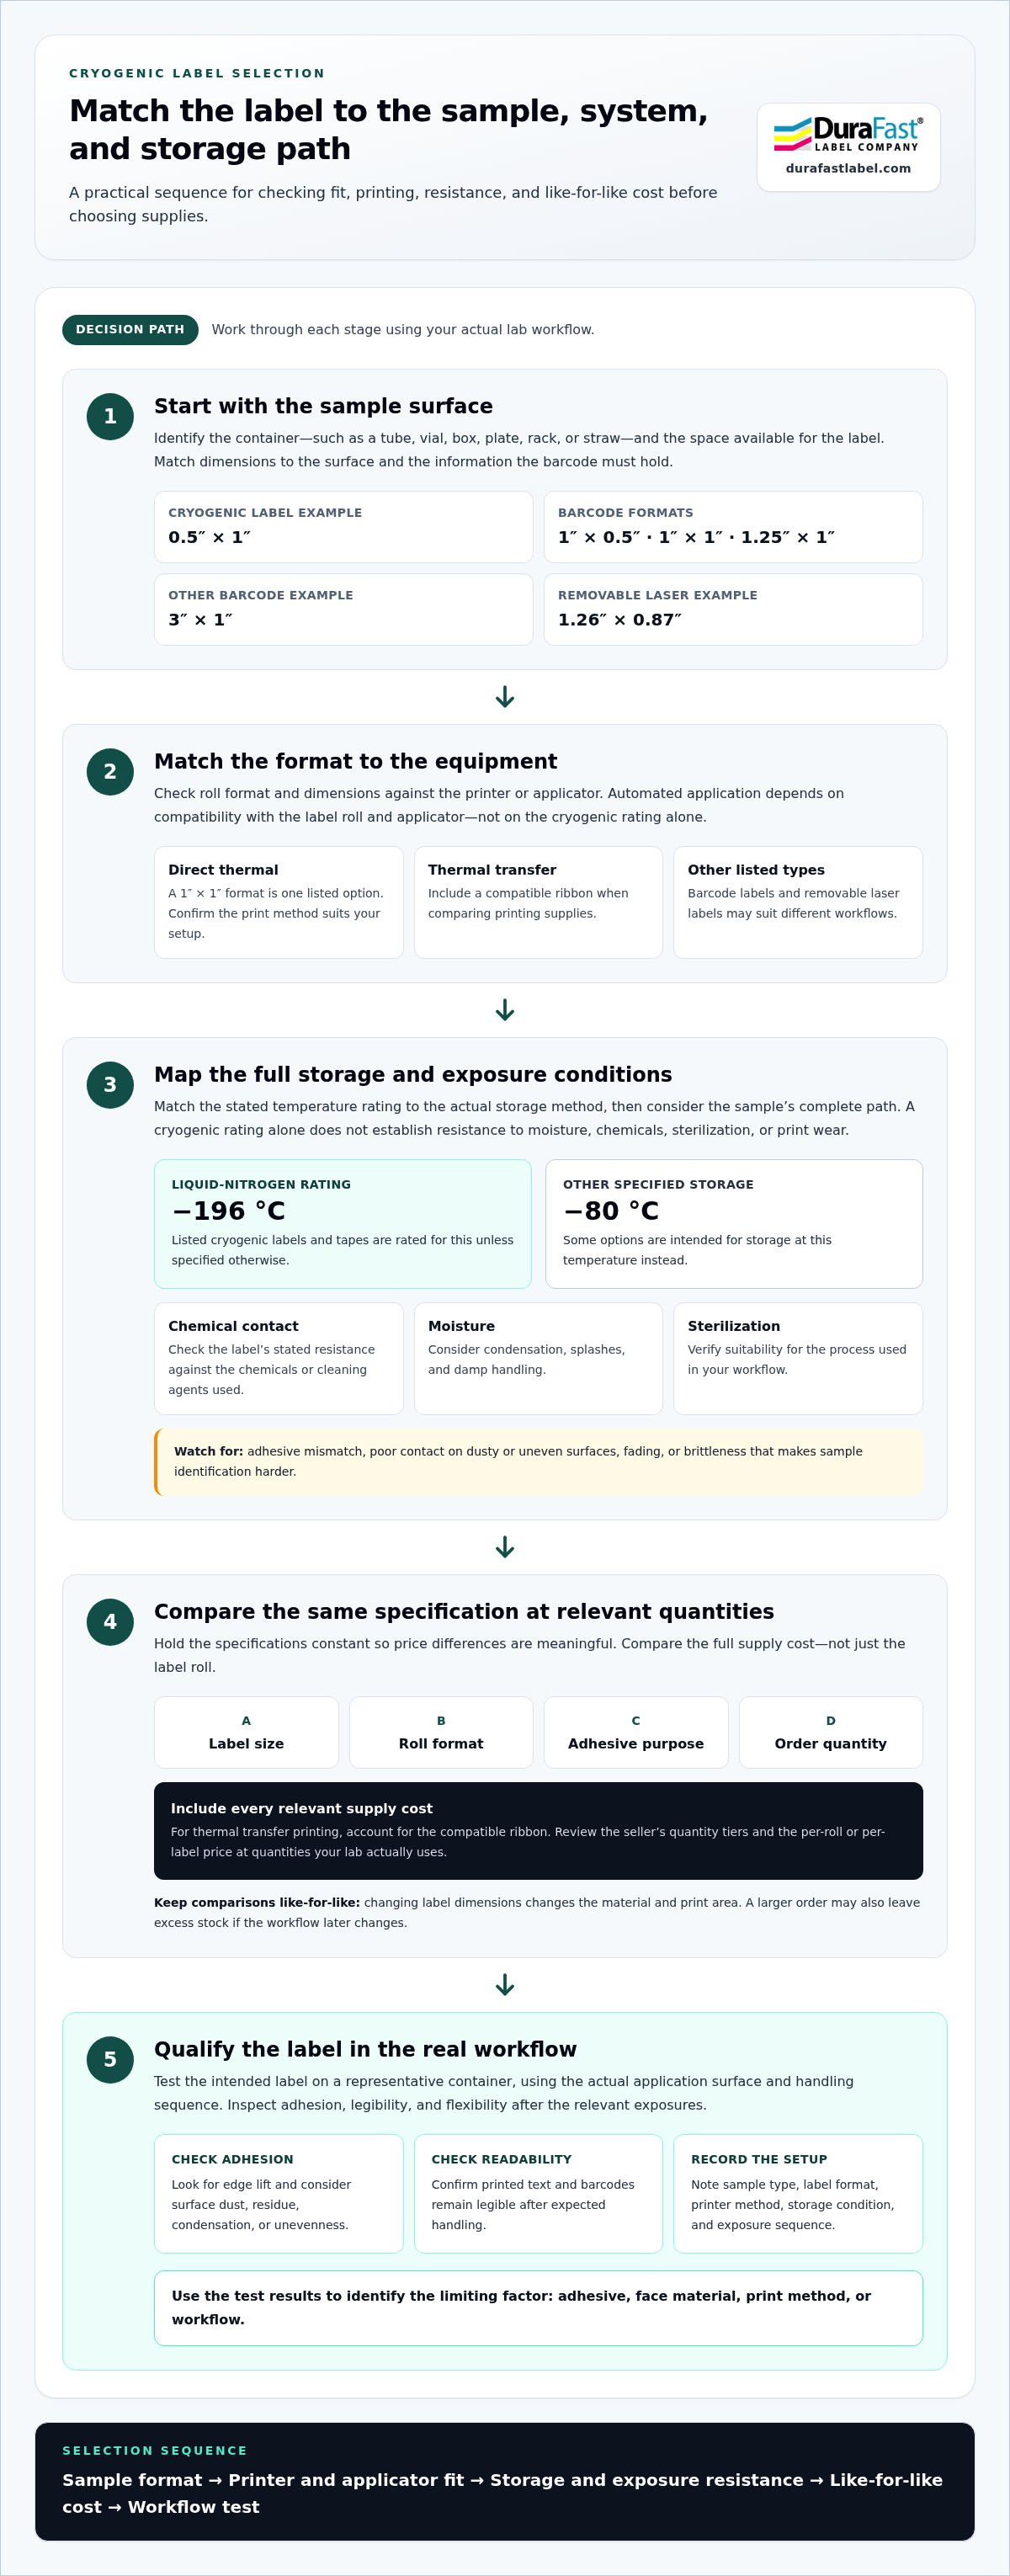
Cryogenic label prices vary by format, material, adhesive, print method, and order quantity. Compare the full supply cost, not just the label roll. A lower unit cost may not be worthwhile if the dimensions waste space or the format will not feed through your printer or applicator. First match the label to the sample and equipment, then compare quotes for the same specifications.
Which cryogenic label brands are recommended for biobanks and research labs? No single brand suits every lab. Prioritize products with documented storage-temperature resistance and a format compatible with your workflow. Compare label construction, intended application, and printer requirements before choosing by brand.
Product types include barcode labels, direct thermal labels, removable laser labels, and labels designed for thermal transfer printing. Size affects usable print area and label fit. Available examples include cryogenic labels measuring 0.5″ x 1″, barcode formats measuring 1″ x 1″ or 3″ x 1″, and removable laser labels measuring 1.26″ x 0.87″. Match the dimensions to the container’s surface and the information your barcode must hold.
- Barcode format: Compare 1″ x 0.5″, 1″ x 1″, and 1.25″ x 1″ options against the sample and code layout.
- Direct thermal: A 1″ x 1″ format is one listed option; confirm the printing method suits your setup.
- Laser: A removable 1.26″ x 0.87″ label may suit workflows that need removability.
- Thermal transfer: Include the compatible ribbon when comparing the complete printing supply.
For cryogenic labels for lab samples, hold specifications constant in each price comparison. Compare the same label size, format, adhesive purpose, and order quantity across quotes. Then account for printing supplies, including ribbons for thermal transfer printing. Changing from a 1″ x 1″ barcode label to a 3″ x 1″ format changes the label material and print area, so those prices aren’t a like-for-like comparison.
Quantity discounts depend on the seller’s order tiers and the product selected. Review pricing at the quantities your lab actually uses, rather than assuming a larger order always lowers total cost. Check the per-roll or per-label price, the quantity break, and compatibility with your printer or applicator. A bulk order can leave you with excess stock in a size your workflow later changes.
Use this three-step comparison before purchasing: choose the sample format, identify the printer method, then compare the same product specification at relevant order quantities. For example, compare 1″ x 1″ direct thermal labels only with the same size and print method. A clear specification for cryogenic labels for lab samples makes price differences easier to assess and helps biobanks and research labs match purchases to their equipment and supply needs.
Chemical, moisture, and sterilization resistance
A cryogenic rating covers only part of a label’s working conditions. Listed cryogenic labels and tapes are rated to resist liquid nitrogen at -196 °C unless specified otherwise. Some options are specified for storage at -80 °C instead. Match the stated temperature to the sample’s actual storage method before comparing resistance to chemicals, moisture, or sterilization.
What are the main risks of cryogenic labels peeling, fading, or becoming brittle? Peeling can result from a mismatch between the adhesive, container surface, and application conditions. Fading or brittleness can make sample identification harder, so assess print durability and label flexibility as well as storage-temperature suitability.
Build a resistance checklist around the sample’s complete path, not just its freezer location. A vial, for example, may encounter moisture during handling, a solvent during laboratory work, and sterilization before storage. Each exposure can challenge a different part of the label: the face material, printed information, or adhesive bond. A label suited to one step may not work for every step.
- Temperature: Separate products rated for liquid nitrogen at -196 °C from those specified for -80 °C storage.
- Chemical contact: Name the chemical or cleaning agent in your workflow, then compare it with the label’s stated resistance information.
- Moisture: Consider whether condensation, splashes, or damp handling occur before samples return to storage.
- Sterilization: Identify the process used and verify that the label and printed data are suitable for that exposure.
Surface preparation matters, too. Dust, residue, condensation, or an uneven vial surface can interfere with label contact. Apply a test label to a representative container using your normal workflow, then inspect its edges and printed details after each relevant handling step. Record the sample type, label format, printer method, storage condition, and exposure sequence. This helps distinguish a material mismatch from an application issue.
Printing method also affects the evaluation. Direct thermal printing forms an image on heat-sensitive label material, while thermal transfer printing uses a ribbon. With either method, check whether the printed barcode and text remain readable after the exposures your lab expects. A cryogenic rating alone does not establish resistance to moisture, chemicals, or sterilization, or guarantee print durability.
Run a small qualification test before changing your full lab supply. Test the intended label on the actual tube, vial, box, or rack, using the real application surface and handling sequence. Check adhesion, legibility, and flexibility after relevant exposures, then compare the results with your identification requirements. This can reveal whether the limiting factor is the adhesive, face material, print method, or workflow.
Choosing labels for tubes, vials, boxes, plates, racks, and straws
How should lab tubes and vials be labeled for cryogenic storage? Match label dimensions to the available surface, then position the identification so it stays visible during handling. Choose a label and adhesive rated for the sample’s storage conditions, and verify the fit on the actual tube or vial before routine use.
Start with the container shape. A narrow tube offers less flat space than a storage box, while a curved vial can make label placement and barcode scanning more demanding. Available examples include 0.5″ x 1″ labels, 1″ x 0.5″ barcode labels, and 1″ x 1″ formats. Compare the label’s width and height with the usable area, not simply the container’s overall size.
For vials, keep the label clear of caps, seams, and surfaces that prevent smooth contact. Try the intended placement on a representative vial, then check whether the full barcode and sample identification remain readable. A 1″ x 0.5″ format may suit a smaller area, while a 1″ x 1″ label offers a different layout. Actual fit depends on the vial surface and required information.
- Tubes and vials: Check curvature, available label area, and barcode visibility after placement.
- Boxes and racks: Compare the label face with the designated identification panel and storage layout.
- Plates: Choose a placement that leaves the sample wells unobstructed and identifiers easy to scan.
- Straws: Measure the available label area and check that identification remains visible in the intended holder.
Boxes and racks often have broader, flatter identification areas than tubes, but the label still needs to fit the designated panel. A 3″ x 1″ barcode label may be appropriate where that full area is available; it can be too large for a compact vial. For plates, keep labels clear of wells and surfaces used for handling. For straws, measure the label zone carefully before selecting a format.
Automated application adds another fit check. Compare the applicator’s supported roll format and label dimensions with the product you select. Then test placement on the same container type used in the lab. A label that fits by measurement may still need repositioning to avoid seams, curved edges, or obscured identification.
For long-term storage, assess the complete identification workflow: container, label position, scanner access, and storage arrangement. Test the chosen format on the actual tube, vial, box, plate, rack, or straw. Check whether identifiers remain readable when containers are in their usual holders. This fit test can catch layout problems before the label format becomes part of routine sample handling.
Cryogenic label kits and compatible ribbons
A practical cryogenic labeling setup pairs the label format, printer method, and required printing supplies. A kit can simplify the choice, but check what it contains: labels, a ribbon, or both. Match every component to your printer and sample workflow. A label’s cryogenic rating alone does not establish ribbon compatibility.
Start with the printing method. Direct thermal printing creates an image without a ribbon, so a ribbon is not needed. Thermal transfer printing uses a ribbon, and the label material and ribbon must work together. Don’t choose a ribbon based only on the label’s cryogenic purpose. Confirm the printer’s supported ribbon type and the label’s print method.
Next, match the label dimensions and roll format to your printer or applicator. For example, listed cryogenic barcode sizes include 1″ x 1″ and 3″ x 1″. Those formats require different label layouts and may not fit the same workflow. A kit should suit the container surface, barcode design, and equipment feeding the labels. Include any automated applicator requirements in that comparison.
- Printer method: Decide whether the workflow uses direct thermal or thermal transfer printing.
- Label format: Match size and roll format to the printer and applicator.
- Ribbon: For thermal transfer, choose a ribbon compatible with both printer and label face.
- Storage conditions: Compare the label’s stated rating with the intended freezer or cryogenic storage environment.
Temperature claims deserve a close read. Some listed labels and tapes are rated for liquid nitrogen at -196 °C, while others specify -80 °C storage. Those are distinct use conditions, not interchangeable descriptions. Confirm that the kit’s label rating matches the planned storage temperature. Then consider the sample’s route into the freezer, including handling and any exposure that could affect printed identification.
Before ordering a complete supply, test one matched combination. Print a sample barcode using the intended printer, label, and ribbon, then inspect it on the actual container. Check that the label feeds correctly and the printed information remains readable after normal handling and storage. Record the label size, printer method, ribbon, and storage condition to make repeat orders easier to match.
A useful kit reduces guesswork only when its components are compatible. Treat it as a coordinated set, not a substitute for checking equipment requirements. A thermal-transfer label kit needs a suitable ribbon, while a direct-thermal setup does not use one. Confirm the method first, then compare label dimensions, temperature rating, and printer fit. This helps labs maintain a consistent supply for freezer and cryogenic storage.
Which label materials and adhesives work for liquid nitrogen storage?
Choose a label whose stated temperature rating matches the sample’s storage conditions. Cryogenic labels and tapes listed for liquid-nitrogen resistance are rated to -196 °C unless specified otherwise. Some options are specified for -80 °C storage instead. These ratings describe different conditions, so match the product rating to the freezer or liquid-nitrogen workflow.
Material and adhesive work together. The face material carries the printed identification, while the adhesive holds the label to the container. A label may suit the storage temperature but still fail in your workflow if it does not bond well to the sample surface or fit the container. Consider the specific surface, such as a vial, tube, or storage box, when comparing options.
Use this selection sequence to narrow the choice:
- Set the storage condition: Identify whether samples go into liquid nitrogen or a freezer specified for -80 °C storage.
- Identify the container: Note whether the label will sit on a curved vial, narrow tube, or flat box.
- Match the product rating: Choose a label or tape with a stated rating for the intended storage condition.
- Review the adhesive fit: Consider the actual container surface and how the label will be applied.
Application is another part of the decision. Before adopting a format, place a test label on the actual container and inspect its edges. Check that it lies smoothly and keeps the printed identification visible. A small curved vial and a flat storage box present different surfaces, so a successful test on one does not establish fit on the other.
Also consider the sample’s route into storage. If labels are applied before containers enter a freezer, include that sequence in your evaluation. If application happens under different conditions, test that process directly. The container surface and application method matter alongside the product’s stated temperature rating. Record the label type, container, and storage condition so you can repeat the chosen specification.
Don’t infer chemical, moisture, or sterilization resistance from a cryogenic temperature rating alone. These are separate exposures. If a sample workflow includes cleaning agents, damp handling, or sterilization, assess each against the label’s stated performance information. Also consider whether direct thermal or thermal transfer printing suits the label and printer. Temperature suitability does not establish print-method compatibility.
For a focused comparison, list the storage condition, container surface, application sequence, and printing method. Then narrow options using their stated ratings and intended use. This keeps the decision tied to the actual sample workflow, rather than assumptions based on a material name. Discuss label and adhesive options for your lab workflow when you’re ready to compare them.
DuraFast Label Company: Epson ColorWorks C6000A
DuraFast Label Company offers the Epson ColorWorks C6000A and other label-printing options for labs reviewing their labeling workflow. The Afinia L801 Color Label Printer and Zebra ZT411 Thermal Transfer Printer provide additional printer choices, while DuraFast Matte Chemical Labels address chemical-labeling needs.
For cryogenic sample identification, match the printer and label to the required format, printing method, and storage conditions. A printer choice alone does not establish that a label will withstand liquid nitrogen or freezer storage. Compare the label’s stated temperature rating and fit on the container before selecting supplies.
If you’re narrowing down equipment and label options for your lab, contact DuraFast Label Company to discuss your workflow.
Make your next labeling decision easier
Make label selection a repeatable part of your lab’s workflow. Before your next supply order, write down the sample types, printer setup, storage path, and identification needs your team actually uses. This specification can help colleagues compare options consistently and avoid treating every reorder as a new decision.
For cryogenic labels for lab samples, align the labeling setup with the people who apply, scan, and retrieve samples. Gather their input, then evaluate options against day-to-day use. A shared standard gives your team a clear reference as workflows or equipment change.
DuraFast Label Company can help you explore label and printer options suited to your workflow. Contact DuraFast Label Company to discuss your next step. A clear specification helps your lab move forward with confidence.
Frequently Asked Questions
Can you apply cryo labels to frozen tubes?
Apply labels to frozen tubes only if they are intended to adhere to a frozen surface. Frost, condensation, and handling can interfere with contact, so check the tube surface and the label’s application instructions. If your workflow allows, label tubes before freezing, then confirm placement and readability. For already frozen samples, test the chosen label on a representative tube before using it across a batch.
What are wrap-around cryo labels?
Wrap-around cryo labels are designed to encircle a tube or vial, using its circumference to provide identification space. They can help when the flat label area is narrow. Match the label width and length to the tube so it wraps securely without obscuring the cap or critical markings. Check that text or barcodes remain visible when tubes are placed together in a rack.
What printers and ribbons work best for cryo labels?
The right setup depends on the label’s print method and the printer’s supported media. Direct thermal labels print without a ribbon; thermal transfer labels require a compatible ribbon. For barcode use, print a sample with the intended label and printer, then scan it at the point of use. Check that the format feeds correctly and the printed information suits your identification process.
What temperatures can cryo labels withstand?
Follow the temperature rating stated for the specific label, rather than assuming every cryogenic product has the same range. Listed labels and tapes may be rated for liquid nitrogen at -196 °C, while some are specified for -80 °C storage. These ratings describe different storage conditions. Match the label rating to the sample’s planned environment, and review whether the product’s stated use covers your storage method.
What are cryogenic labels for laboratory samples?
Cryogenic labels identify samples stored in very low-temperature environments, including laboratory tubes, vials, and containers. They combine a printable face with an adhesive intended for the stated storage conditions. Labs use them to keep information such as sample codes or barcodes associated with the correct container. The right format depends on the container surface, printer method, and information required by your tracking workflow.
What temperatures can cryogenic labels withstand?
There isn’t one temperature rating that applies to every cryogenic label. Check the individual product’s stated limit and intended storage conditions. For example, some listed products are rated for liquid nitrogen at -196 °C, and others specify -80 °C storage. Treat those values as product-specific guidance, not interchangeable ratings, and select the one that matches the sample’s actual storage environment.
Are cryogenic labels compatible with direct liquid nitrogen immersion and vapor-phase storage?
Compatibility depends on the label’s stated performance for the storage method, not temperature alone. A rating for liquid-nitrogen resistance at -196 °C does not by itself establish suitability for direct immersion or vapor-phase storage. Identify which method your lab uses, then select a label whose product information covers that condition. Apply the same distinction when documenting workflows for different sample groups.
What label printers, ribbons, and inks are compatible with cryogenic labels?
Compatibility starts with the label’s printing method. Direct thermal labels don’t use ink or ribbon, while thermal transfer printing uses a ribbon matched to the label and printer. Inkjet labels require an inkjet printer and compatible ink. A ribbon must be compatible with the label stock to produce a print. Check the media type and run a sample print before settling on a production setup.