Whmis Label Printer Services for Workplace Chemical Labels
2nd Nov 2026
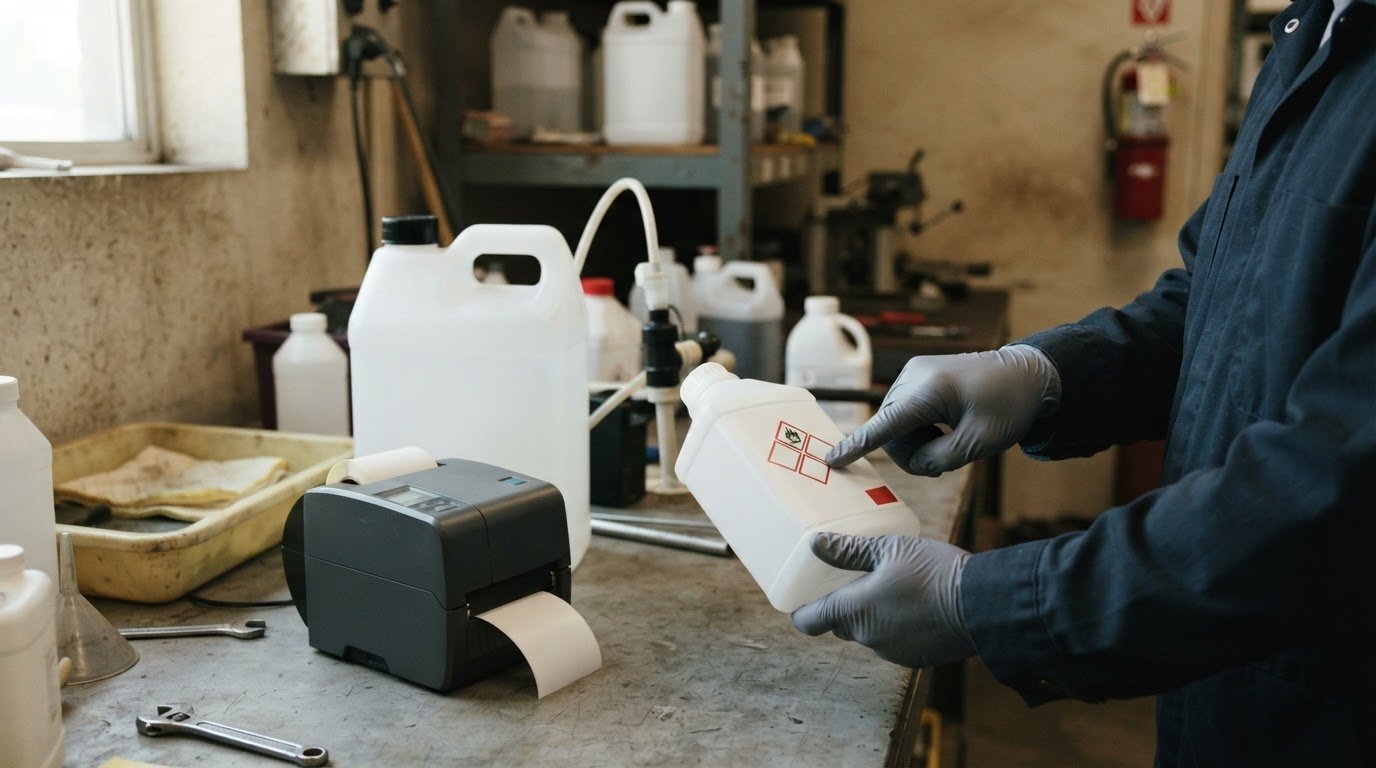
One label format won’t suit every chemical container. A WHMIS label printer should support labels that match the product’s safety data sheet (SDS), as well as workplace labels for chemicals transferred into secondary containers. The right choice depends on what information each label needs to show and the conditions it must withstand.
It’s easy to focus on the printer and overlook the label itself. But matching label content to the safety data sheet (SDS) is central to clear hazard communication, and labels on decanted products need to remain useful where the chemical is handled. This guide explains the difference between supplier and workplace labels, what information to carry over from the SDS, and which printing features to consider for legible, durable labels. You’ll also learn how to plan for smaller containers and choose equipment and supplies that fit your workplace needs.
Key Takeaways
- Match label wording to the product’s safety data sheet so hazard information stays consistent and easy to identify.
- Choose label material and printing methods with the workplace conditions in mind, so labels remain legible during normal handling.
- Compare printer connectivity and software compatibility with your existing workflow before selecting equipment.
- Balance print clarity, speed, and capacity against the size and volume of labels your team needs.
- Plan separate workplace labels for decanted products, using the SDS to guide the information workers need at the point of use.
Consistency between labels and safety data sheets
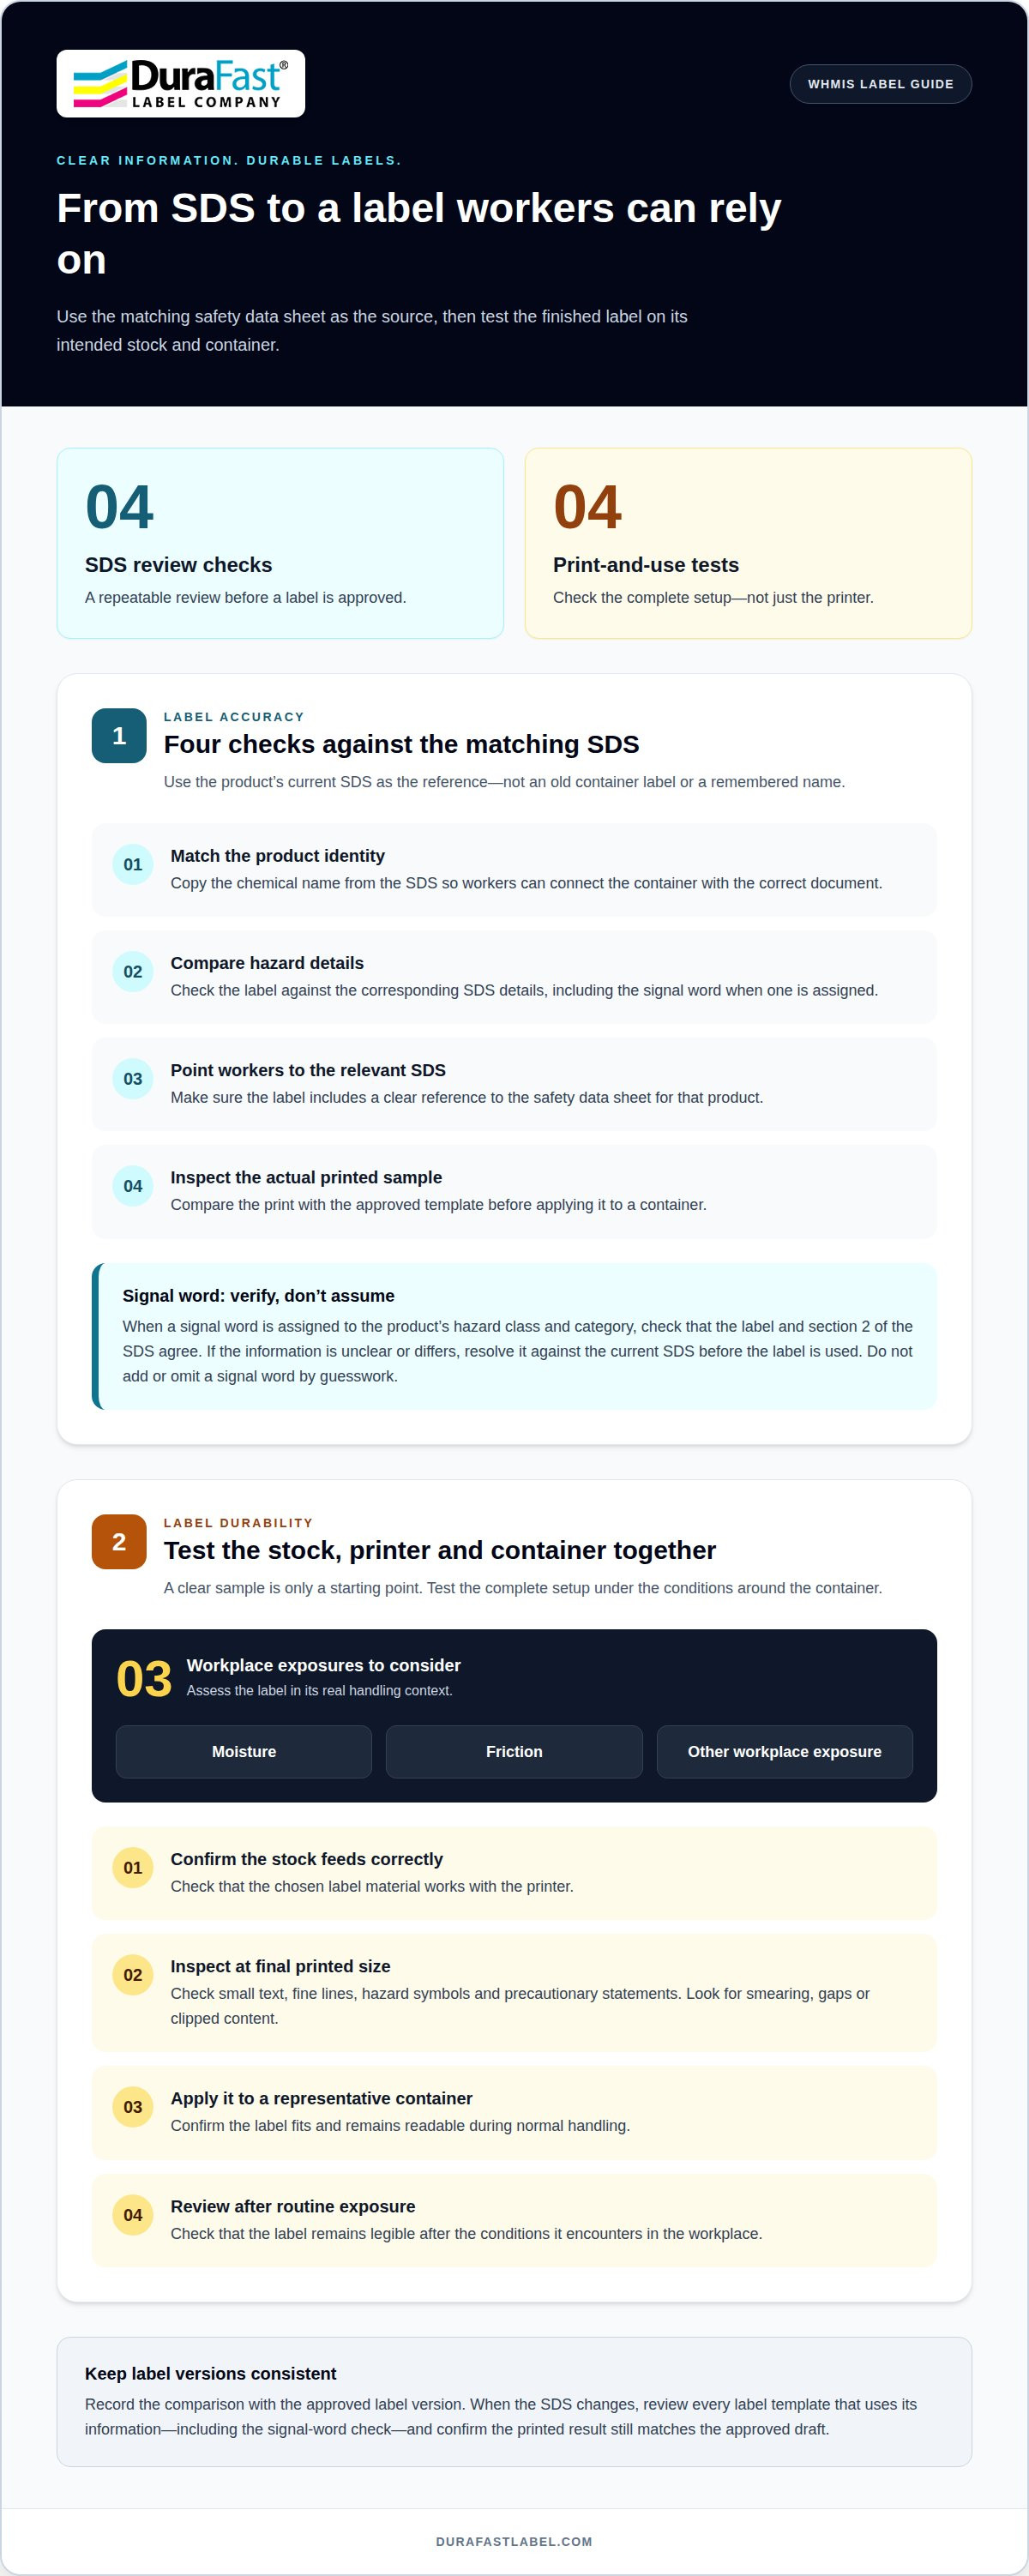
Keep each chemical label aligned with the safety data sheet (SDS) for that product. Use the SDS as the reference when creating or revising a label. An old container label or a remembered product name can lead to mismatched information, especially when similar chemicals have different hazard details.
Start with the product identity. Copy the chemical name from the SDS so workers can connect the container with the correct document. Include a clear reference to the SDS, then compare the label’s hazard information with the corresponding SDS details. If the SDS changes, review every label template that uses its information.
Use a repeatable review for each chemical:
- Match the product name on the label to the SDS.
- Compare hazard details and any signal word shown in both places.
- Make sure the label points workers to the relevant SDS.
- Review a printed sample against the approved template before applying it.
What software and templates are available for creating WHMIS labels? Label-design software can help organize reusable layouts for product names, hazard information, and SDS references. Set up formats for the label sizes your workplace uses, then compare the populated draft with the matching SDS before printing. A separate template may be useful for unrelated label types, such as pillow law labels.
What are common WHMIS label printing mistakes and compliance risks? Frequent mistakes include using a different product name, copying outdated hazard details, or omitting an SDS reference. A crowded layout can also make important information hard to read. Use the SDS as your source, review templates after edits, and compare the final print with the approved draft before applying it to a container.
Give the signal word a dedicated check during label review rather than treating it as incidental wording. In Canada, suppliers must show a signal word on the label and in section 2 of the safety data sheet when one is assigned to the product's hazard class and category. For each product, confirm whether that condition applies, then check that the label and section 2 agree. Do not infer a signal word from a product name or carry one over from a different product. If the relevant information is unclear or the two documents differ, pause the label approval and resolve the discrepancy against the current SDS before the label is used. This makes the conditional requirement part of the review without adding unsupported wording to the label.
Keep a record of the comparison with the approved label version so a later reviewer can see which SDS information was checked. When an SDS is updated, revisit the signal-word check as part of the label review, even if the product identity and layout appear unchanged. If no signal word is assigned for the product’s hazard class and category, don’t add one by guesswork. If one is assigned, don’t leave it off either document. Check the actual printed label, since text present in a draft can be lost or obscured during printing. The goal is a clear, consistent pairing of the assigned signal word with its corresponding product information, not an assumption that every chemical uses the same wording. Base the decision on the matching SDS, not a general template or memory.
Label printing and durability
Choose label stock and printing method together. The finished label needs to stay readable on its chemical container during routine workplace handling. Test the complete setup with the actual label design, stock, and container before using it for regular print jobs.
Label Durability
Durability depends on the label material, printer, and conditions around the container. Consider how often workers handle it and whether the label may encounter moisture, friction, or other workplace exposure. A WHMIS label printer can produce a clear sample, but you still need to test the print on the chosen stock and container.
Can standard laser or inkjet printers print WHMIS labels? Yes, if the printer supports the label stock and the design prints clearly. Test a sample at its final size, then check that text, hazard symbols, and precautionary statements remain legible when attached to the intended container.
Inspect more than the overall appearance. Check small text, fine lines, and symbols workers need to recognize quickly. Look for smearing, gaps, or clipped content. If a label includes several statements, confirm the print remains easy to read without forcing workers to decipher crowded wording.
Printer and Supply Costs
How much do WHMIS label printers and supplies cost? Total costs depend on the equipment, label stock, ink or ribbon, and workplace printing needs. Compare ongoing supply requirements as well as the printer itself. Choose a WHMIS label printer that works with the label materials and print volume your team plans to use.
Before selecting supplies, print a sample using the intended template and media. Confirm that the stock feeds correctly and the finished label fits the container. A useful test includes the smallest text and all printed symbols, not just a large product name. This can reveal layout or media issues before staff produce labels in quantity.
Use this review for each proposed printer-and-stock combination:
- Confirm that the label material feeds correctly through the printer.
- Inspect text and symbols at the printed size.
- Apply the sample to a representative container and assess readability during normal handling.
- Review the label again after routine workplace exposure.
Keep the approved stock and printer settings with the template. That gives staff a consistent starting point when they print the same label format again. If your workflow needs help matching label materials and equipment, discuss your label printing needs.
Printer connectivity and compatibility
A label workflow depends on more than the printer. Check how the computer, label software, printer, and label stock work together before choosing equipment. A test print can reveal layout, graphics, or connection problems before staff rely on the setup.
Start with the computer that will send print jobs. Identify its operating system and the connection method available at the workstation. A printer beside one computer may suit a direct connection, while a shared setup may need network access. Match the printer’s supported connection options to how workers prepare and print labels.
Next, confirm that the label-design software supports the printer and its driver. Open a sample template and print a draft containing a product name, pictograms, a signal word, and a warning statement. Check that each element appears in the right position. A preview alone won’t show whether the printer interprets the template correctly.
Compatibility also includes label format. Set template dimensions to match the label stock, then confirm the printer can feed that format. If a design includes colored hazard symbols or dense text, inspect the printed output at its actual size. Cut-off edges, missing graphics, or unexpected line breaks can make an otherwise usable template difficult to read.
- Confirm the computer’s operating system and available connection method.
- Match the printer driver to the design software.
- Set the template size to the physical label stock.
- Print a sample with text, pictograms, and a signal word.
- Review alignment and readability on the container where the label will appear.
For shared printing, test the complete route from workstation to printer. Send a draft from each computer staff will use, and check whether the correct template and label size remain selected. This can catch a mismatch between a workstation’s saved settings and the printer’s loaded stock. Keep the approved template accessible to the people preparing labels.
Plan for changes, too. A revised template may use different graphics or longer hazard wording, so print a new sample after editing it. Test the revised file through the same software and connection used for routine production. This practical check can help distinguish a design issue from a driver, connection, or media setup problem.
Choose a WHMIS label printer setup that fits the actual workflow, not just the available desk space. When teams can reliably send the approved design and produce a correctly aligned sample, they can print more consistently across workstations and container types.
Use label-design software that supports the printer and its driver. Templates can include a product name, pictograms, a signal word, and a warning statement, with dimensions set to match the label stock.
Printer resolution, speed, and capacity
Assess these three features against the label designs and print workload your team handles. A sample label and a record of routine print jobs offer a practical starting point.
Printer Resolution
Resolution affects how clearly small text, fine lines, and hazard symbols reproduce. Inspect a printed sample at its final label size, not just on a screen. Check the smallest safe-handling instructions, the word “Danger” where it appears, and the edges of each pictogram. If any element looks crowded or unclear, revise the layout or compare a printer with a different resolution.
Dense designs need particular attention. A small container label may have less room for text than a larger workplace label. Print both formats using the same design workflow, then compare readability where workers will handle them. The right resolution is the one that reproduces the required design legibly on the chosen stock.
Printing Speed
Printer speed matters most when staff print labels in batches or during busy production periods. Track the labels needed for a typical job and observe how long the complete process takes, including loading stock and preparing files. A printer’s stated output rate alone may not reflect the time workers spend selecting templates, correcting layouts, or replacing supplies.
Run a representative batch with varied designs, such as a chemical-container label and a larger storage label. Note pauses, reprints, and any time needed to adjust the print job. This shows whether the workflow keeps pace with handling tasks without sacrificing clear hazard information.
Printer Capacity
Capacity includes the label formats and media a printer can handle, along with how smoothly it supports the team’s regular print volume. List the stock used for each container type and the labels produced during routine work. Then compare that needs list with the printer’s supported media and loading process. A mismatch can cause interruptions even when resolution and speed suit the job.
Consider peak demand as well as ordinary use. If one work area prints several chemical labels together, check how often staff must reload stock or pause between batches. Match capacity to the largest recurring job rather than an unusual one-off run. Keep compatible label supplies accessible so a needed format doesn’t delay safe handling.
Use the same test plan to compare candidate printers: print the smallest text, complete a representative batch, and run each required label format. Record legibility, processing time, reloads, and reprints. These observations help balance resolution, speed, and capacity for the real workflow instead of choosing by one specification alone. A suitable setup supports readable hazard information while fitting the team’s printing rhythm.
Workplace labels for decanted products
Moving a hazardous chemical into a secondary container changes what workers see at the point of use. A clear workplace label connects that container with the chemical’s safety information and handling precautions. Keep the label close to the chemical, not only in a binder or digital file.
How do I create and print a compliant WHMIS label? Start with the chemical’s safety data sheet (SDS), use its product name, and transfer the relevant safe-handling information into a readable label template. Print the label, check it against the SDS, then attach it to the secondary container.
For workplace labels, use the SDS as the source for the chemical identity and precautions. Use the exact name shown on the SDS and refer workers to that document. Safe-handling instructions should reflect information in Section 7, while personal protective equipment should follow Section 8. This gives workers concise direction and a clear route to more detail.
In the United States, OSHA’s Hazard Communication standard requires secondary chemical-container labels to include the chemical name, hazard pictograms, signal words, and hazard and precautionary statements. Labeling temporary secondary containers helps keep hazard information visible at the point of use. Keep the relevant details visible, even when a worker expects to use the container briefly.
A practical label-making sequence is:
- Identify the product in the SDS and copy its chemical name accurately.
- Use the SDS to select safe-handling information and applicable precautions.
- Build the workplace label with the required hazard information and SDS reference.
- Print and inspect a sample, then attach it to the secondary container.
A workplace label can also be made with lab tape and a permanent marker if it includes all three required pieces of information. Keep handwriting legible and make sure the tape stays attached to the container. For printed labels, choose a layout that fits the container without shrinking hazard statements until they become difficult to read.
Before use, compare the finished label with the SDS and inspect the container itself. Confirm the product name, hazard information, and precautions match the chemical being transferred. Replace damaged or unreadable labels so workers can identify the contents during handling. Keep the SDS accessible to workers who need fuller instructions.
For help planning label materials and a printing setup for decanted products, discuss your workplace label needs.
In Ontario, R.R.O. 1990, Reg. 860 requires a workplace label when a hazardous chemical is transferred into a secondary container and will be kept for more than one day or accessed by multiple individuals. A worker does not need to affix a workplace label if they will use up the transferred hazardous chemical on the same day it was transferred. These conditions help distinguish a container kept for ongoing use from one emptied on the day of transfer.
Non-hazardous chemicals do not require workplace labels under the guidance on this page. For hazardous chemicals that do require a label, make sure the information remains readable and attached during use. SDS Manager describes an example secondary-container label as 4"x6". That size can serve as a reference when choosing a label format, while the product and its handling details should still be checked against the SDS.
DuraFast Label Company: Epson ColorWorks C6000A
DuraFast Label Company offers the Epson ColorWorks C6000A for workplaces setting up in-house chemical-label printing. Its other relevant options include the Zebra ZT411 Thermal Transfer Printer and DuraFast Matte Chemical Labels. Compare these choices with your label formats, printing workflow, and workplace needs.
Think of the printer and label material as one setup. For example, decide whether your workflow calls for color printing or thermal transfer, then select compatible label stock for the intended containers. Explore label printers and supplies at DuraFast Label Company or durafastlabel.com.
Build a label workflow your team can maintain
Your next step is to make label selection part of a repeatable workplace process. Decide who maintains product information, who approves template changes, and how staff access the correct label for each container. A clear workflow helps keep in-house printing consistent as products and handling needs change.
Before settling on a WHMIS label printer, map a real label job from the current safety data sheet to the printed label. Use that exercise to identify the equipment, supplies, and template requirements that matter most in your workplace. Then choose a setup that supports those needs without adding unnecessary steps for staff.
DuraFast Label Company can help you explore label printing options for your operation. Contact DuraFast Label Company to discuss your workplace chemical-label needs and take the next step toward a practical in-house workflow.
Frequently Asked Questions
Are there different types of labels?
Yes. Chemical labels differ by purpose and by the media used to print them. Supplier labels accompany products as supplied, while workplace labels identify chemicals in containers used at work, such as a spray bottle filled from a bulk container. Separately, inkjet and thermal-transfer labels require compatible printing equipment and supplies. Decide first what the label must communicate, then choose its format and material for the container and workplace.
What is a WHMIS label printer?
A WHMIS label printer is equipment used to produce labels that communicate chemical hazard information. It can print a design created in label software, but it doesn’t decide which warnings belong on the label or replace the safety data sheet. For example, a team might use software to prepare separate layouts for incoming chemical containers and smaller in-house containers, then print each layout on matching label stock.
Which printers are best for durable chemical hazard labels?
The best fit depends on the label material, print workflow, and conditions where the container is handled. Match the printer with compatible stock, then inspect a sample for sharp text and legible symbols. DuraFast Label Company offers the Epson ColorWorks C6000A, Afinia L801 Color Label Printer, and DuraFast Matte Chemical Labels. Compare the selected printer and media together, rather than choosing equipment without considering the label it will produce.